|
Use this kind of Shell Extensions
to create your own virtual folders and items to Windows Shell namespace.
Using these extensions your users will be able to reach the data through
native Windows Explorer interface. This example will show how to use a
couple of forms and a few components to implement your own namespace extension.
The Namespace Extension is an ActiveX
library like all other Shell Extensions. The first step to do is to create
a new ActiveX Library. Create it with the following sequence of operations:
open the Repository dialog using File | New | Other... menu, then select
the ActiveX tab and click the ActiveX Library icon.
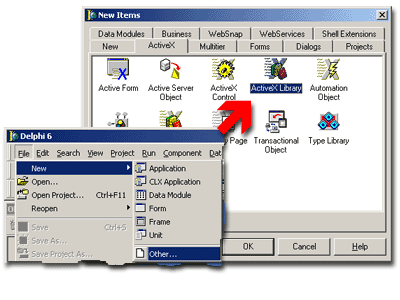
Fig. 1. New ActiveX Library creation.
Save the created project.
The next step is to add the instance of TSxDataModule
to the project. Every Shell+ component should be placed on SxDataModule
1. This special descendant of TDataModule
supplies several internal methods that allow Shell+ components to safely
operates in multiple Shell threads and automates their registration and
initialization. Note that you can place several Shell+ components onto
the same SxDataModule as well as you can add multiple TSxDataModule instances
to your project. It is easy to add new SxDataModule to the project - just
click corresponding icon in the Repository:
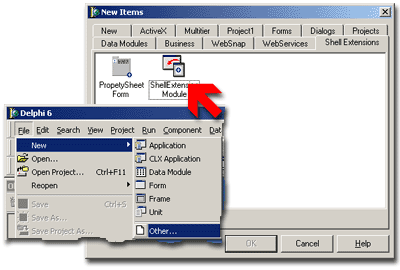
Fig. 2. How to create new SxDataModule instance.
You can save the project now.
Every Namespace Extension library has to operate
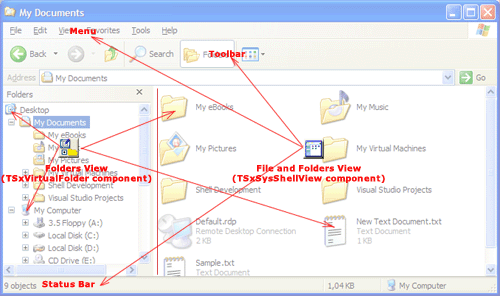
inside the Windows Shell browser - Explorer.exe. Let's consider the figure
below to learn more about different parts of the Explorer. As you can
see there are two Shell+ components that help you to implement your own
namespace. The first one - TSxVirtualFolder - controls folders and files.
The second one interacts with Explorer's menu, status bar and toolbar.
 |
Add the TSxVirtualFolder now. Use
this component to create namespace items that are not related with
file system structure. The registration data of extension based
on this component will be stored in registry. Note that it is one
of several possible registration methods. This method has a limited
number of junction points if compared with file-related method of
registration. On the other side only this method allows to add extensions
to system virtual folders such as "My Computer", "Control
panel", "My network places" etc. |
Look on the properties of TSxVirtualFolder
component:
| Property Name |
Description |
|
CLSID2 |
Automatically generated GUID. All shell extensions
use it to be identified by system. |
|
Description |
Extension description, enter desired text here. |
|
ExtensionName |
Short name of the extension, MyNamespaceExtension
for example. |
|
Name |
An ordinary name of the Delphi component. |
|
Attributes2 |
Attributes of the root folder of the extension. |
|
ContextMenuHandler2 |
TSxContextMenu
link. This component will show the context menu for your shell extension.
Important: always place these two components
on the same form.. |
|
DataProvider |
Data provider reference. Several types of data providers
are available. The data can be static (TSxSimpleTreeProvider) or
dynamic (TSxDataSetTreeProvider), they can be stored in file or
modified in run-time. In other words there are many ways to implement
shell extension behavior you need and below you will find a details
explanation how to use some of them. |
|
DefaultIcon2 |
Default icon of the root folder. It is stored in
a form: [filename],[icon index]. For example: ExNSESysShellView.dll,0 |
|
DeleteOptions2 |
This property controls what occurs when user tries
to delete the root folder of the namespace extension. Windows Shell
can prohibit the operation or hide it from users. |
|
ExtractIconHandler2 |
TSxExtractIcon
reference. Use it to supply dynamic icons for your extension. Note:
this component must be placed onto the same form as TSxVirtualFolder. |
|
HideFolderVerbs2 |
If this property is True the context menu of your
extension will hide standard verbs Open and Explore... |
|
JunctionPoint2 |
Select one of virtual system folders to attach your
namespace extension there. The opportunities are: Control Panel,
Desktop, Entire Network, My Computer, Network Neighborhood or Remote
Computer. |
|
PropertySheetHandler2 |
TSxPropSheetExt
reference. Use this component to add property pages to the root
folder of your namespace extension. |
|
QueryForOverlay2 |
If this property is True then Windows Shell will
query your extension about overlay icon for the root folder of the
namespace extension. |
|
ShellCommands2 |
This property controls the context menu commands
to displayed for the root folder. Enter commands you would like
to override there. Sub-property AnotherCommands you can specify
your own additional commands for the Namespace extension. |
|
ShellView |
Folder view manager reference. This component controls
how the contents of the extension will be displayed at the right
pane of Explorer. |
|
StaticInfoTip2 |
Info tip for the root folder of your namespace extension. |
|
WantsForParsing2 |
If this property is True then Windows will ask for
file and folder names for every element of your namespace extension. |
Table 1. TSxVirtualFolder component properties
 |
Configure the Shell View component now.
This component shows the list of files and folders at the right
pane of Explorer. The TSxSysShellView is used below in this
example. This component uses the native Windows 2000 and Windows
XP abilities of the Shell View.
Note that this component must be placed on the same
form as the Shell Folder component. Use the ShellView property
of the TSxVirtualFolder component to link them. |
TSxSysShellView has no special properties to
be configured.
Add one TPermanentModule to the project. The
difference between this TPermanentModule and TSxDataModule is that the
TSxDataModule is created dynamically and can be unloaded at any time while
TPermanentModule exists always in one instance. It is this module should
carry all data-related components such as TDataSet successors, TSxDataProvider
successors and their related components.
 |
Place a TSxSimpleTreeProvider component
onto this Data Module. Connect it to the DataProvider property
of the TSxVirtualFolder. Do not forget to modify the uses
clause to avoid compiler errors. |
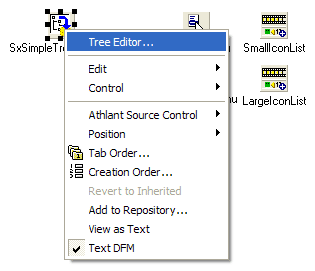
Right click the component now. You will see the
menu with a "Tree editor..." item at the top. Select this item.
The editor of the TSxSimpleTreeProvider will appear.
The properties of TSxSimpleTreeProvider component
are as follows:
| Property Name |
Description |
|
BackgroundContextMenu |
TPopupMenu reference. This menu will be shown when
user right clicks the right pane. |
|
BasicVerbs |
Explore, Open and Properties menu items. Use this
properties to override standard verbs. |
|
CommonContextMenu |
TPopupMenu reference. This menu will be shown for
folders and files of your namespace extension. |
|
FileContextMenu |
TPopupMenu reference. This menu will be shown for
files only. |
|
FolderContextMenu |
TPopupMenu reference. This menu will be shown for
folders only. |
|
FolderIcon |
Icon index. It will be used to display the icons
of the extension folders. |
|
FolderOpenIcon |
Icon index. It will be used to display the icons
of the opened extension folders. |
|
ItemIcon |
Icon index. It will be used to display the icons
of the extension files. |
|
ItemOpenIcon |
Reserveed for future use. |
|
LargeIcons |
TSxIconList reference. Use this property to supply
32x32 icons for your namespace extension. |
|
SmallIcons |
TSxIconList reference. Use this property to supply
16x16 icons for your namespace extension. |
Set OnClick event handles now for all menu items
you need. Add necessary icons into TSxIconList components.
Save the project and compile it
- it is ready now! As well as any other ActiveX library the Shell+ project
requires registration. You can register it in several ways:
- from command prompt using MS regsvr32 utility: regsvr32.exe Project1.dll
- from command prompt using Borland's tregsvr utility: tregsvr Project1.dll
To know more about shell extension installation please follow
the link.
The final step is to test the Namespace extension library.
Open the Windows Explorer and enter the folder of your namespace extension.
It will look like shown below. Note that the position of the root folder
is defined by junction point settings:
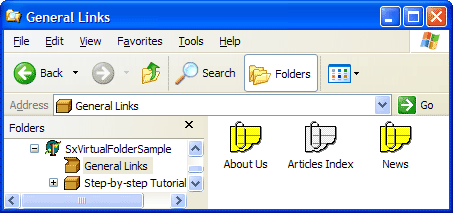
Don't forget to uninstall the example
when all tests are finished. Note that it is an example only and it will
show its confirmation window until you will not unregister it. As well
as installation the uninstallation can be done in many ways:
- from command prompt using MS regsvr32 utility: regsvr32.exe /u Project1.dll
- from command prompt using Borland's tregsvr utility: tregsvr -u Project1.dll
The detailed information about extension uninstallation
is available here.
Use
links below to download source codes of this example as well as binary
files:
| Description and files |
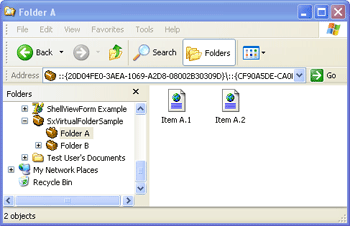
This example demonstrates basic functionality of
Shell Namespace Extensions. It uses TsxSimpleTreeProvider component.
|
TSxByHandProvider Example:
| Description and files |
|
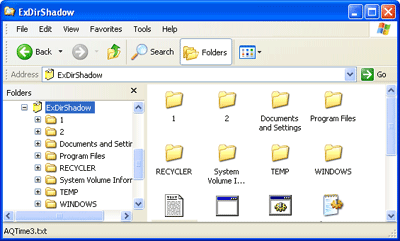
This example will map the computer drive C: as Shell
Namespace Extension. |
TSxShellFormView Example:
| Description and files |
|
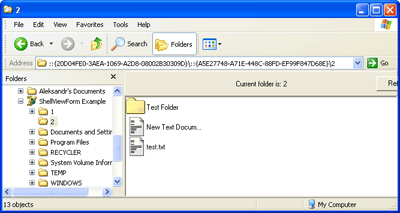
This example demonstrates how to implement custom
shell views for Shell Namespace Extensions. |
This advanced example demonstrates how to combine custom view mode
and system-defined view modes. Read
more...
This example demonstrates basic and advanced functonality for Shell
Namespace Extension. The NSE works with external executable server
via COM interface. Read
more...
 Top
Top
|

